I built a Raspberry Pi router with a Raspberry Pi 5 and a Wi-Fi card.
I achieved Wi-Fi 6 and UPnP, boosting throughput close to the Ethernet bandwidth limit.
What is more? Symmetric NAT (eduroam) => port-restricted NAT with UPnP.
How to make a router with Raspberry Pi
Introduction
Software used:
- hostapd: Controls Wi-Fi interfaces, handles SSID broadcasting, and WPA authentication.
- dnsmasq / Pi-hole: Both dnsmasq and Pi-hole can be used as a DHCP server (assign IPs) and DNS server. I use Pi-hole for DNS only (port 53) and dnsmasq for DHCP (port 67).
- miniupnpd: Provides UPnP capability for P2P connections.
- nftables: Linux firewall.
iptablesis more complex to manage, andufwlacks thorough control. miniupnpd works well with nftables.
Steps / sections:
- Driver handling
- hostapd installation
- Configure Pi-hole and dnsmasq
- UPnP setup
- Benchmarking
- Hardware selection
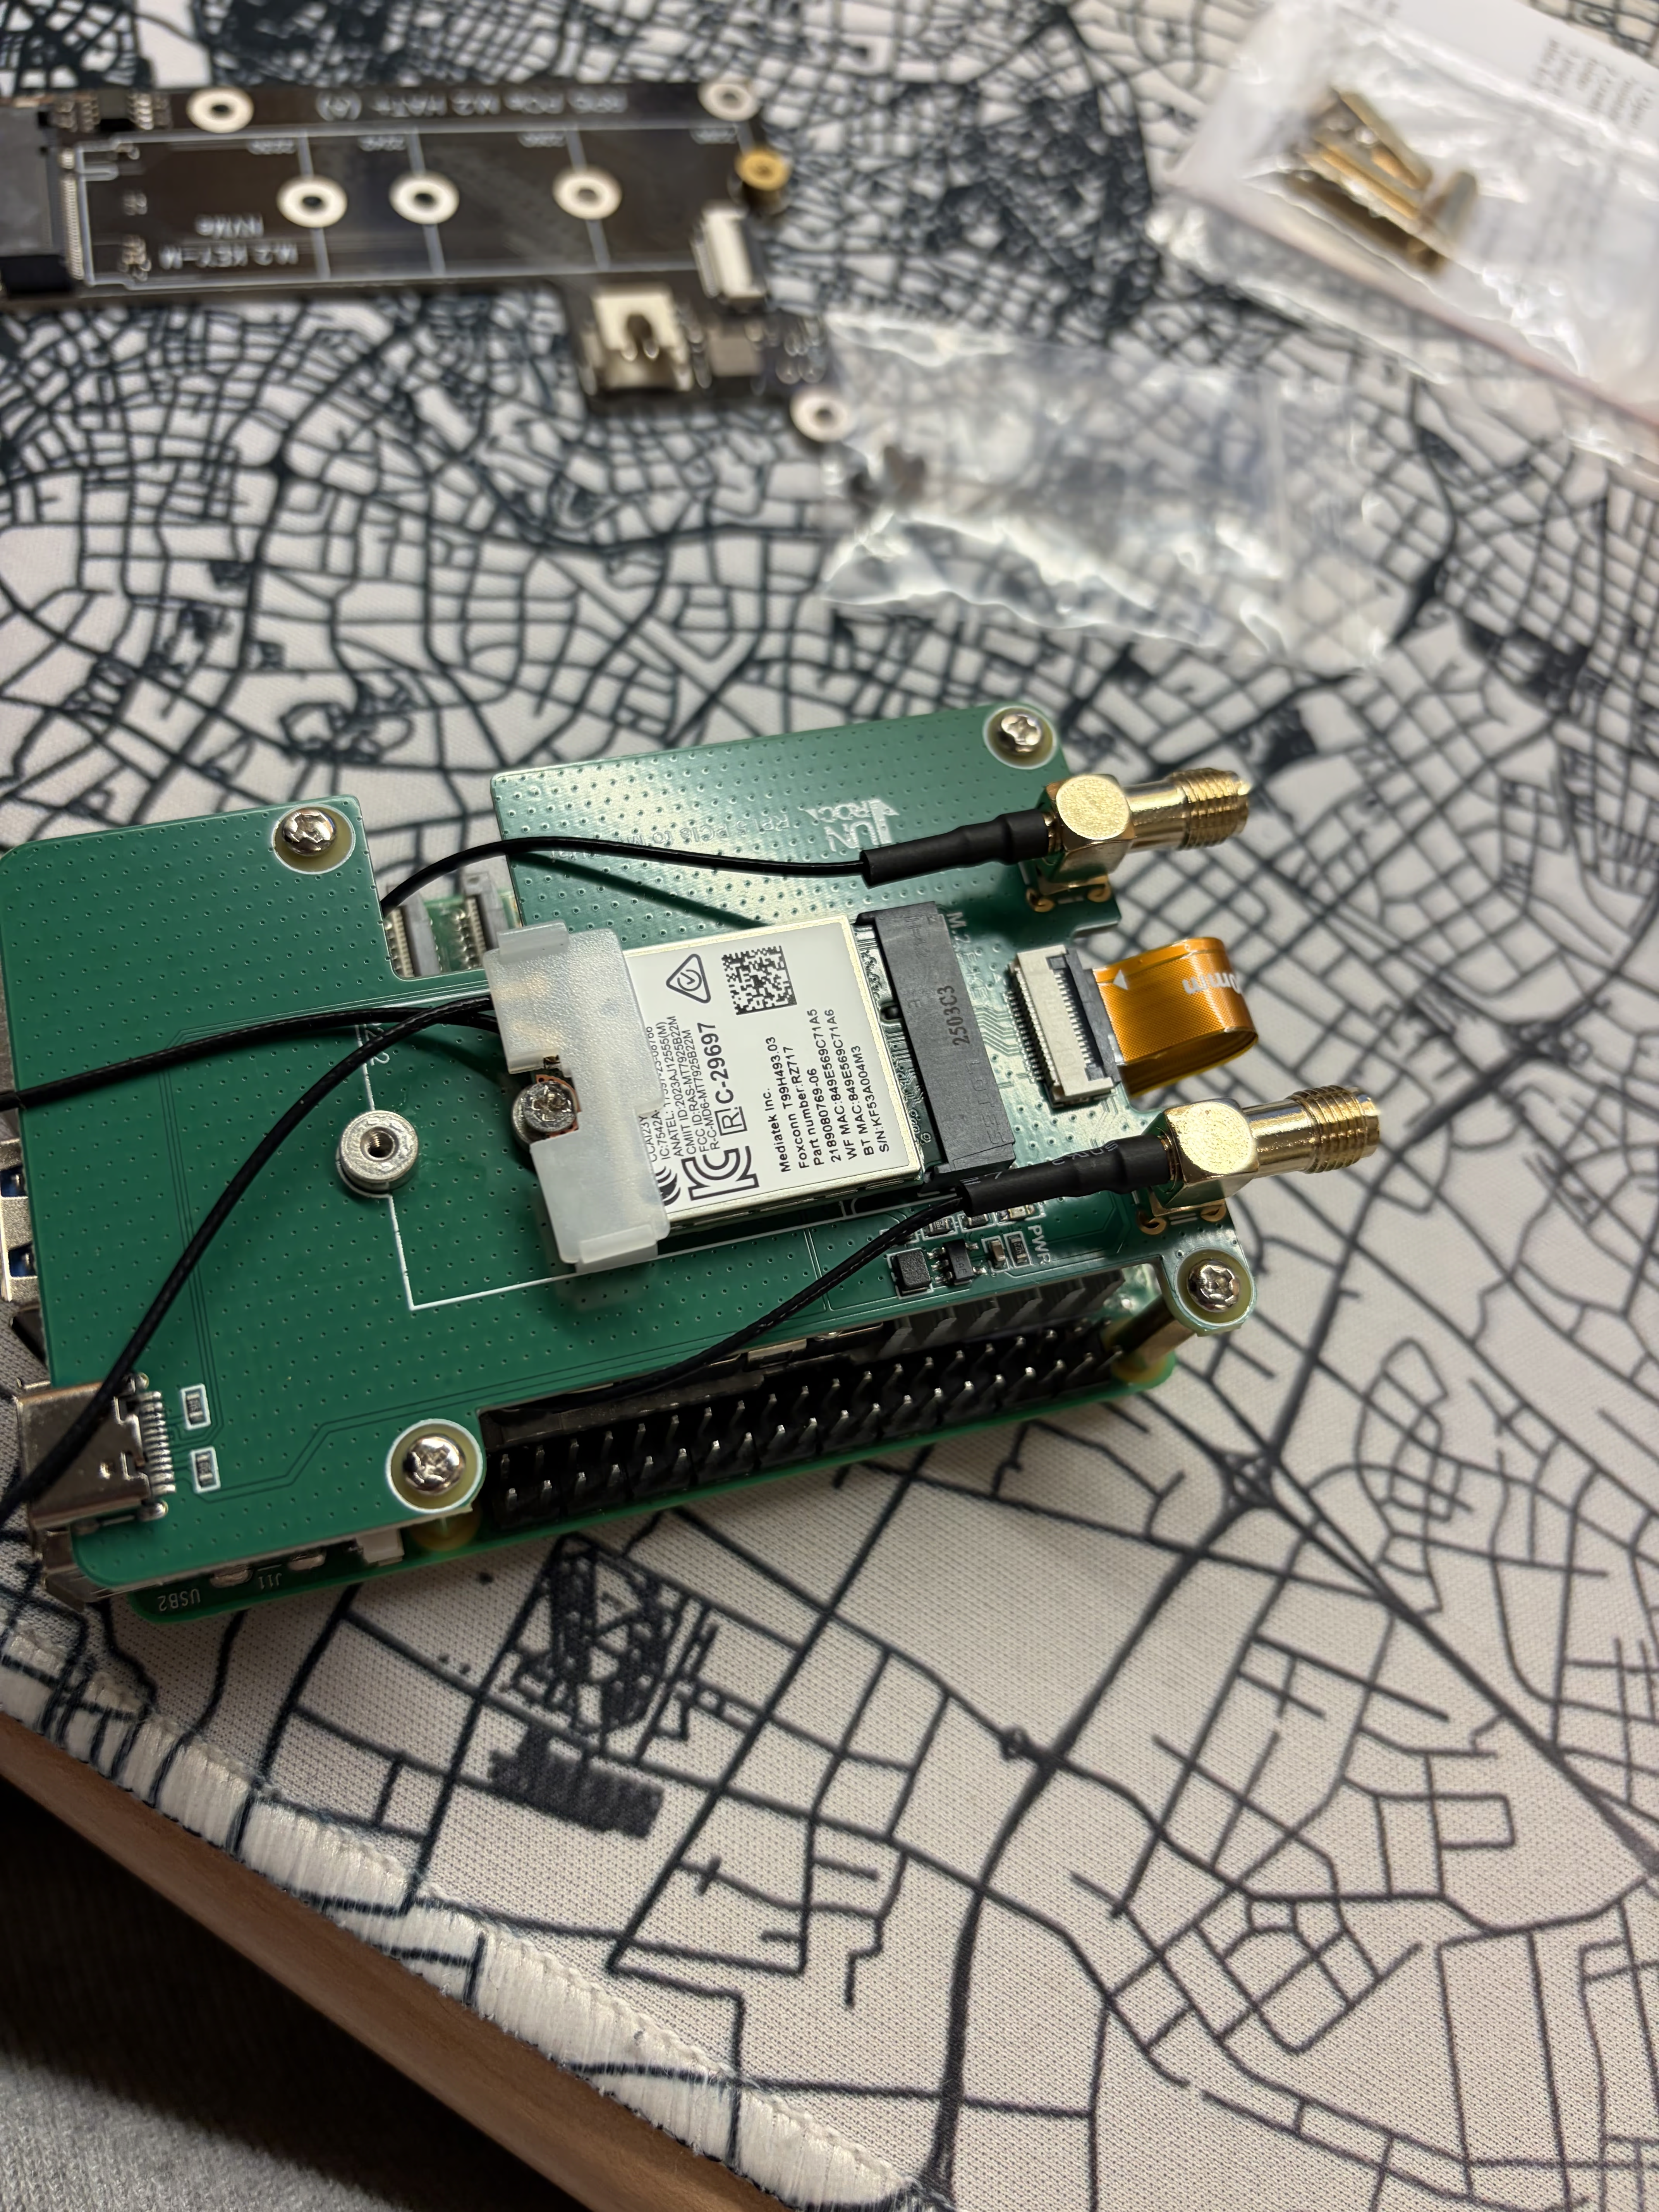
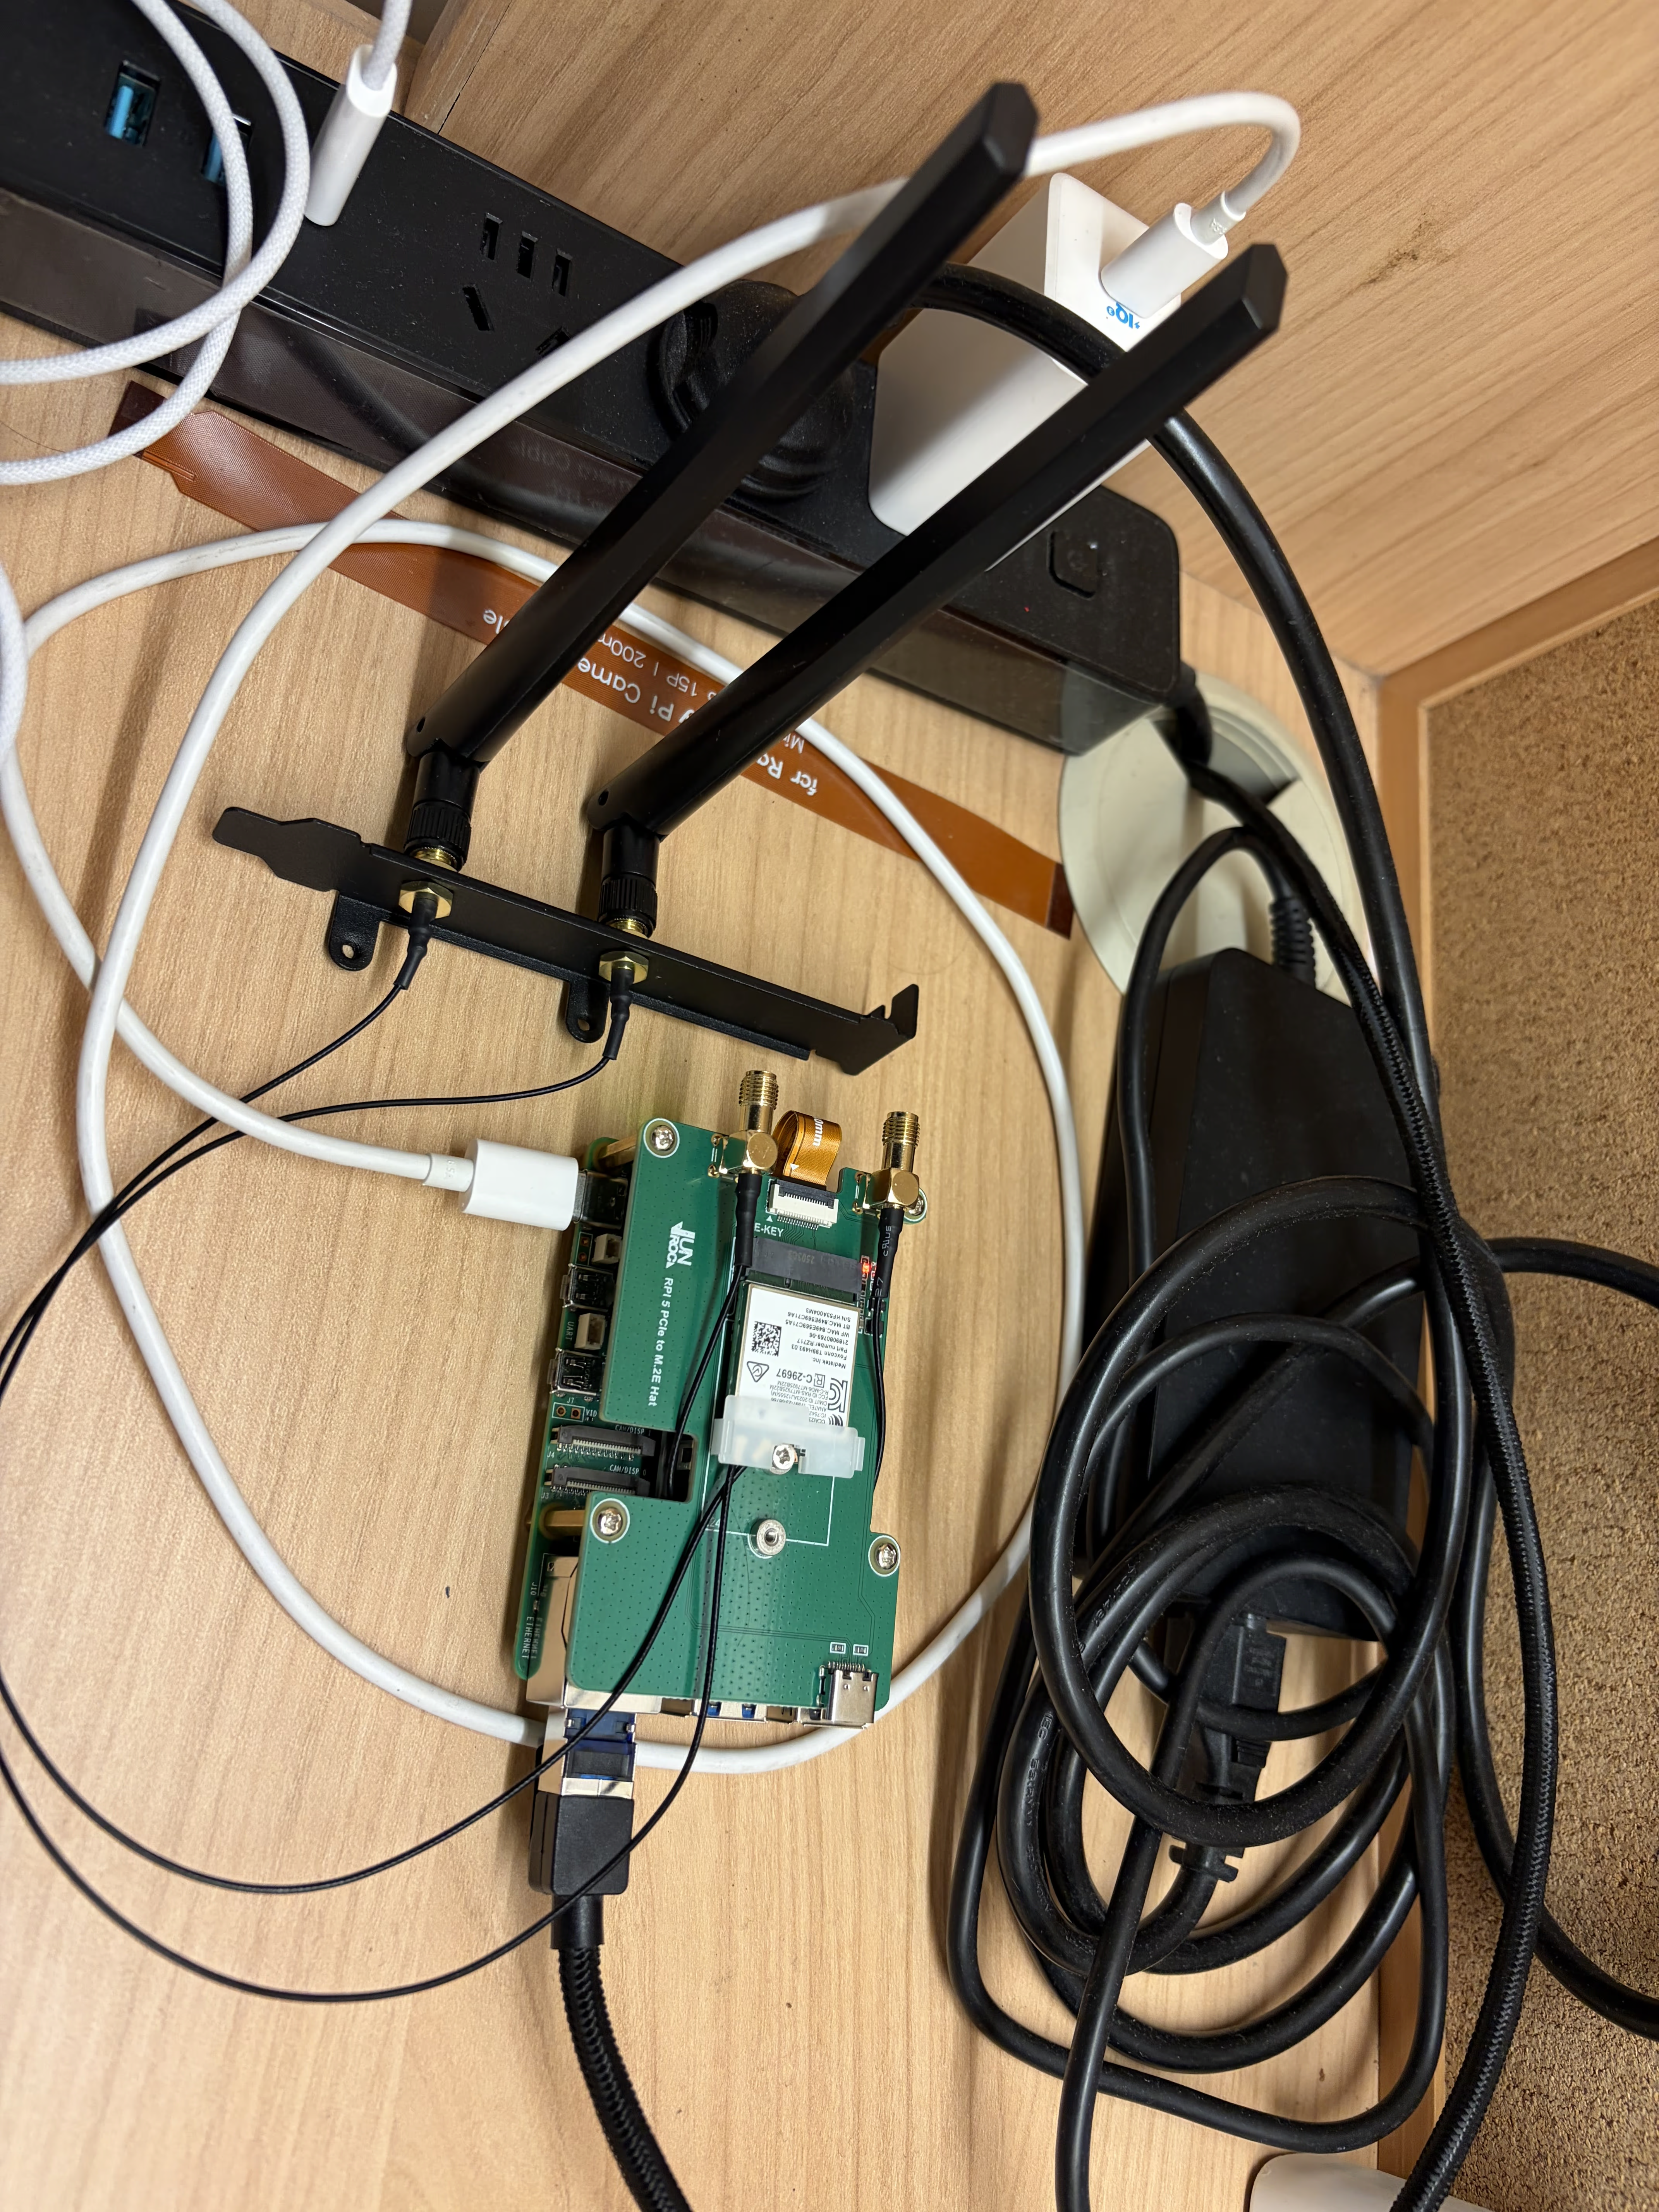
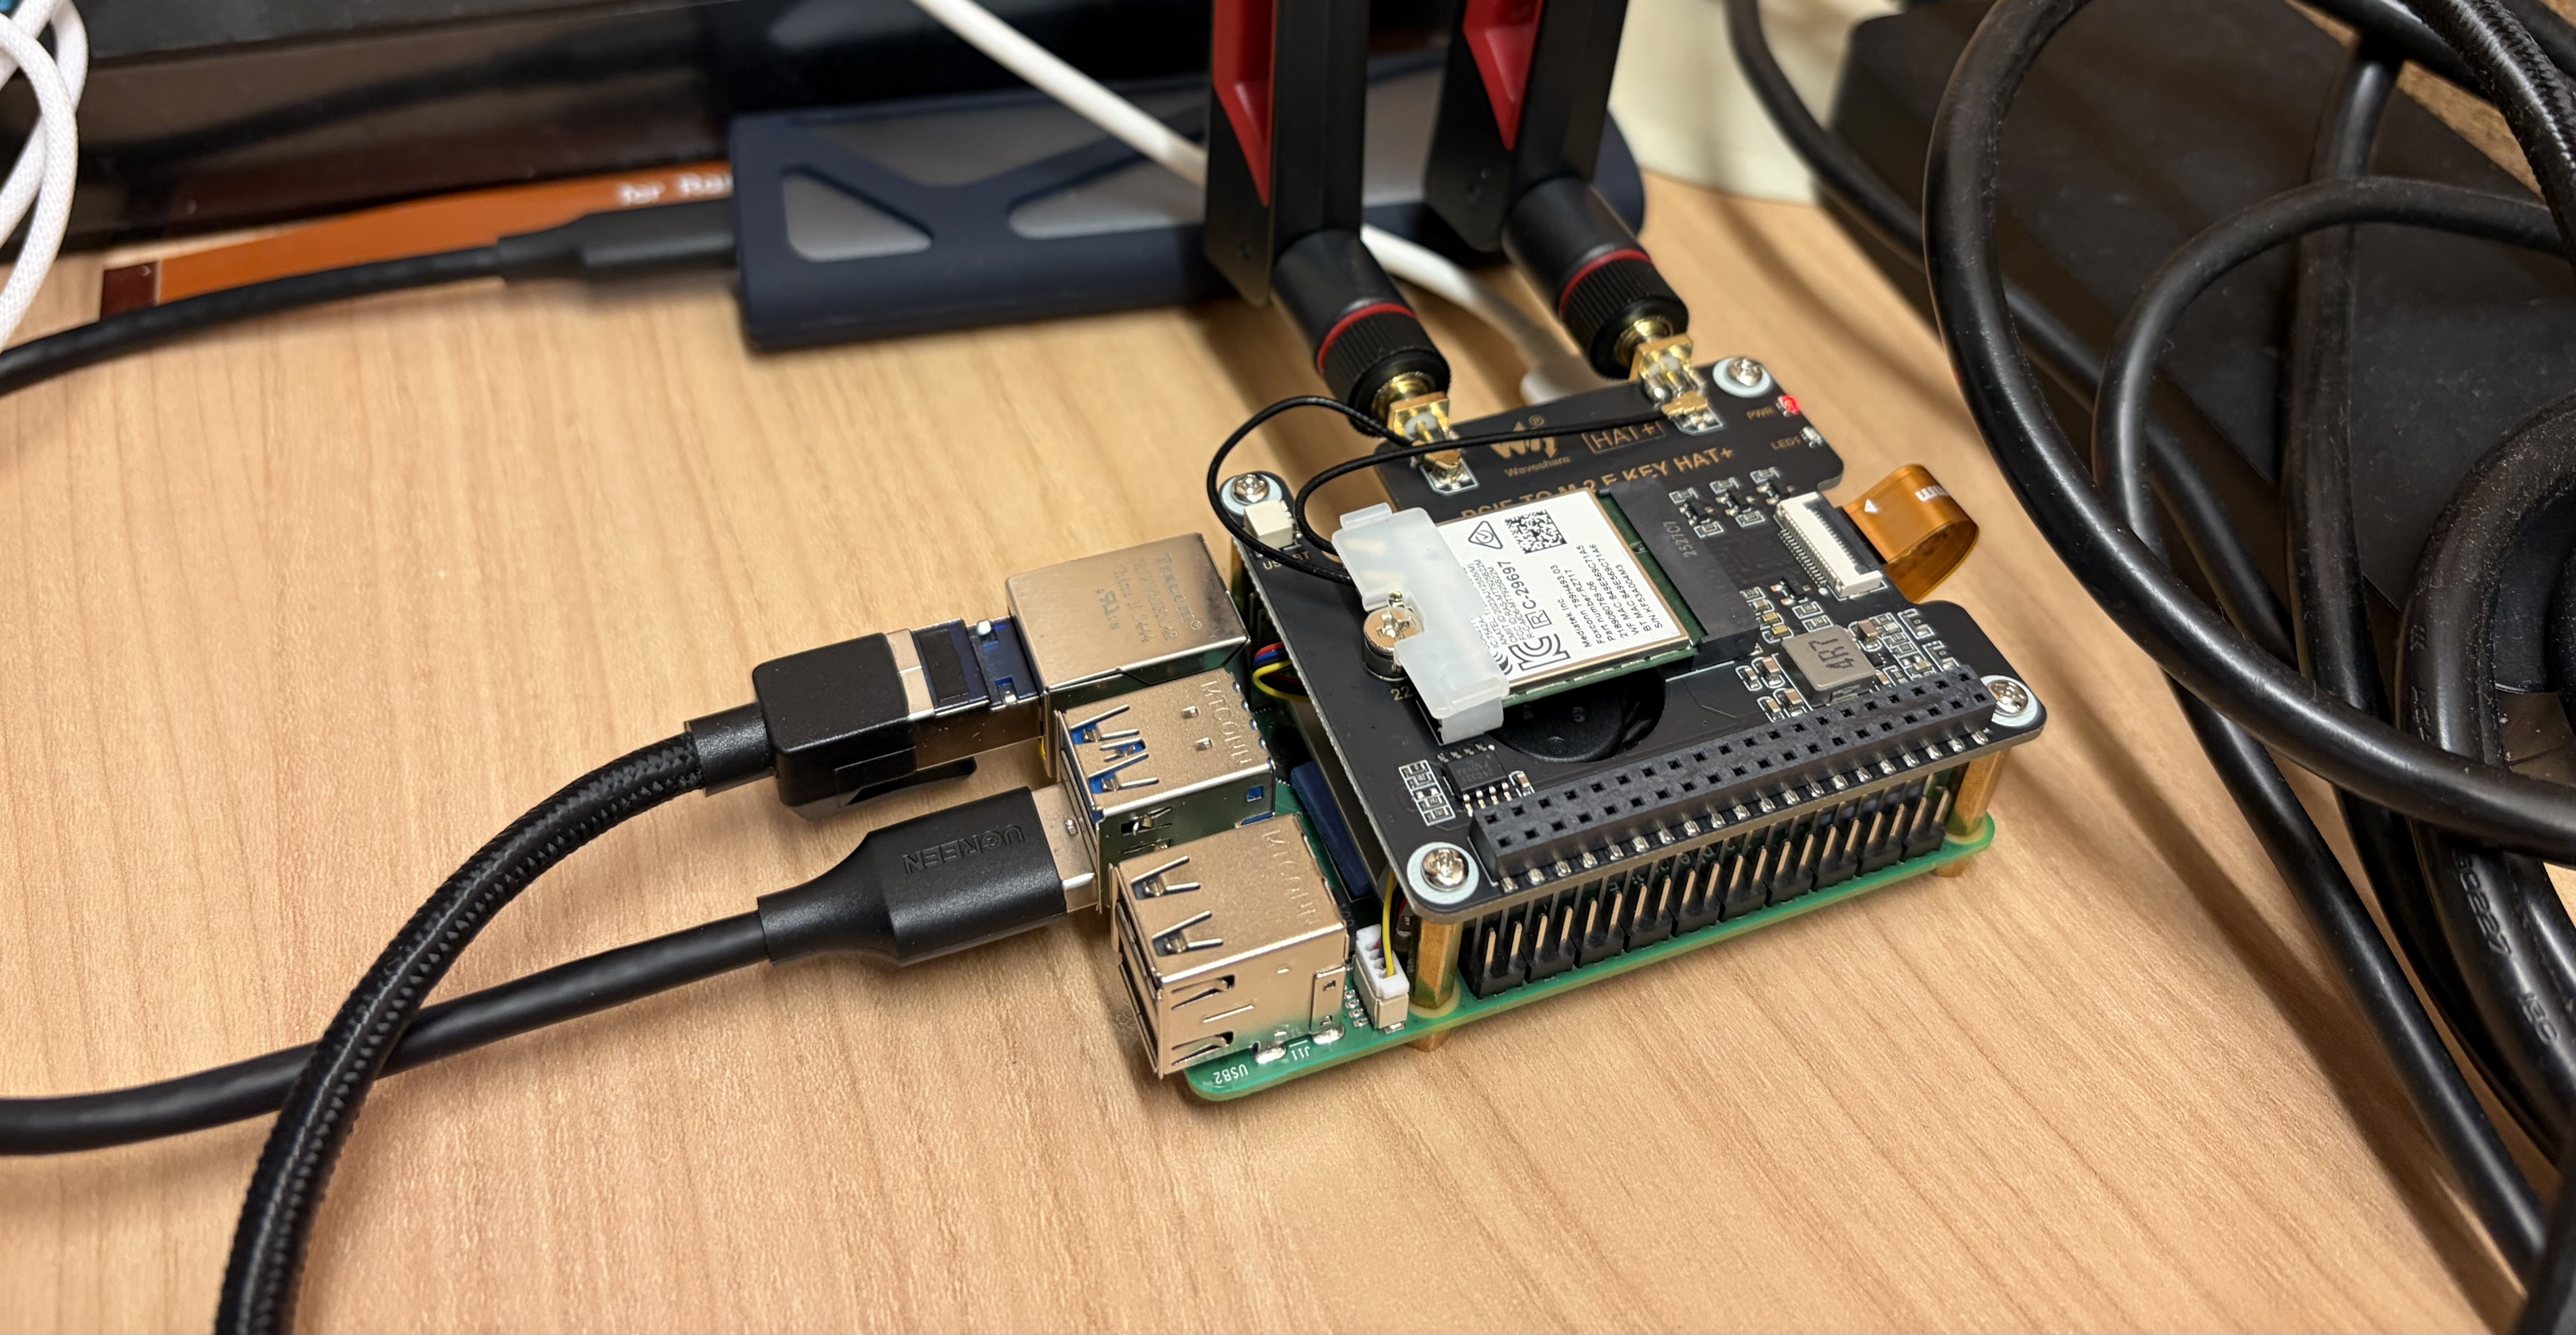
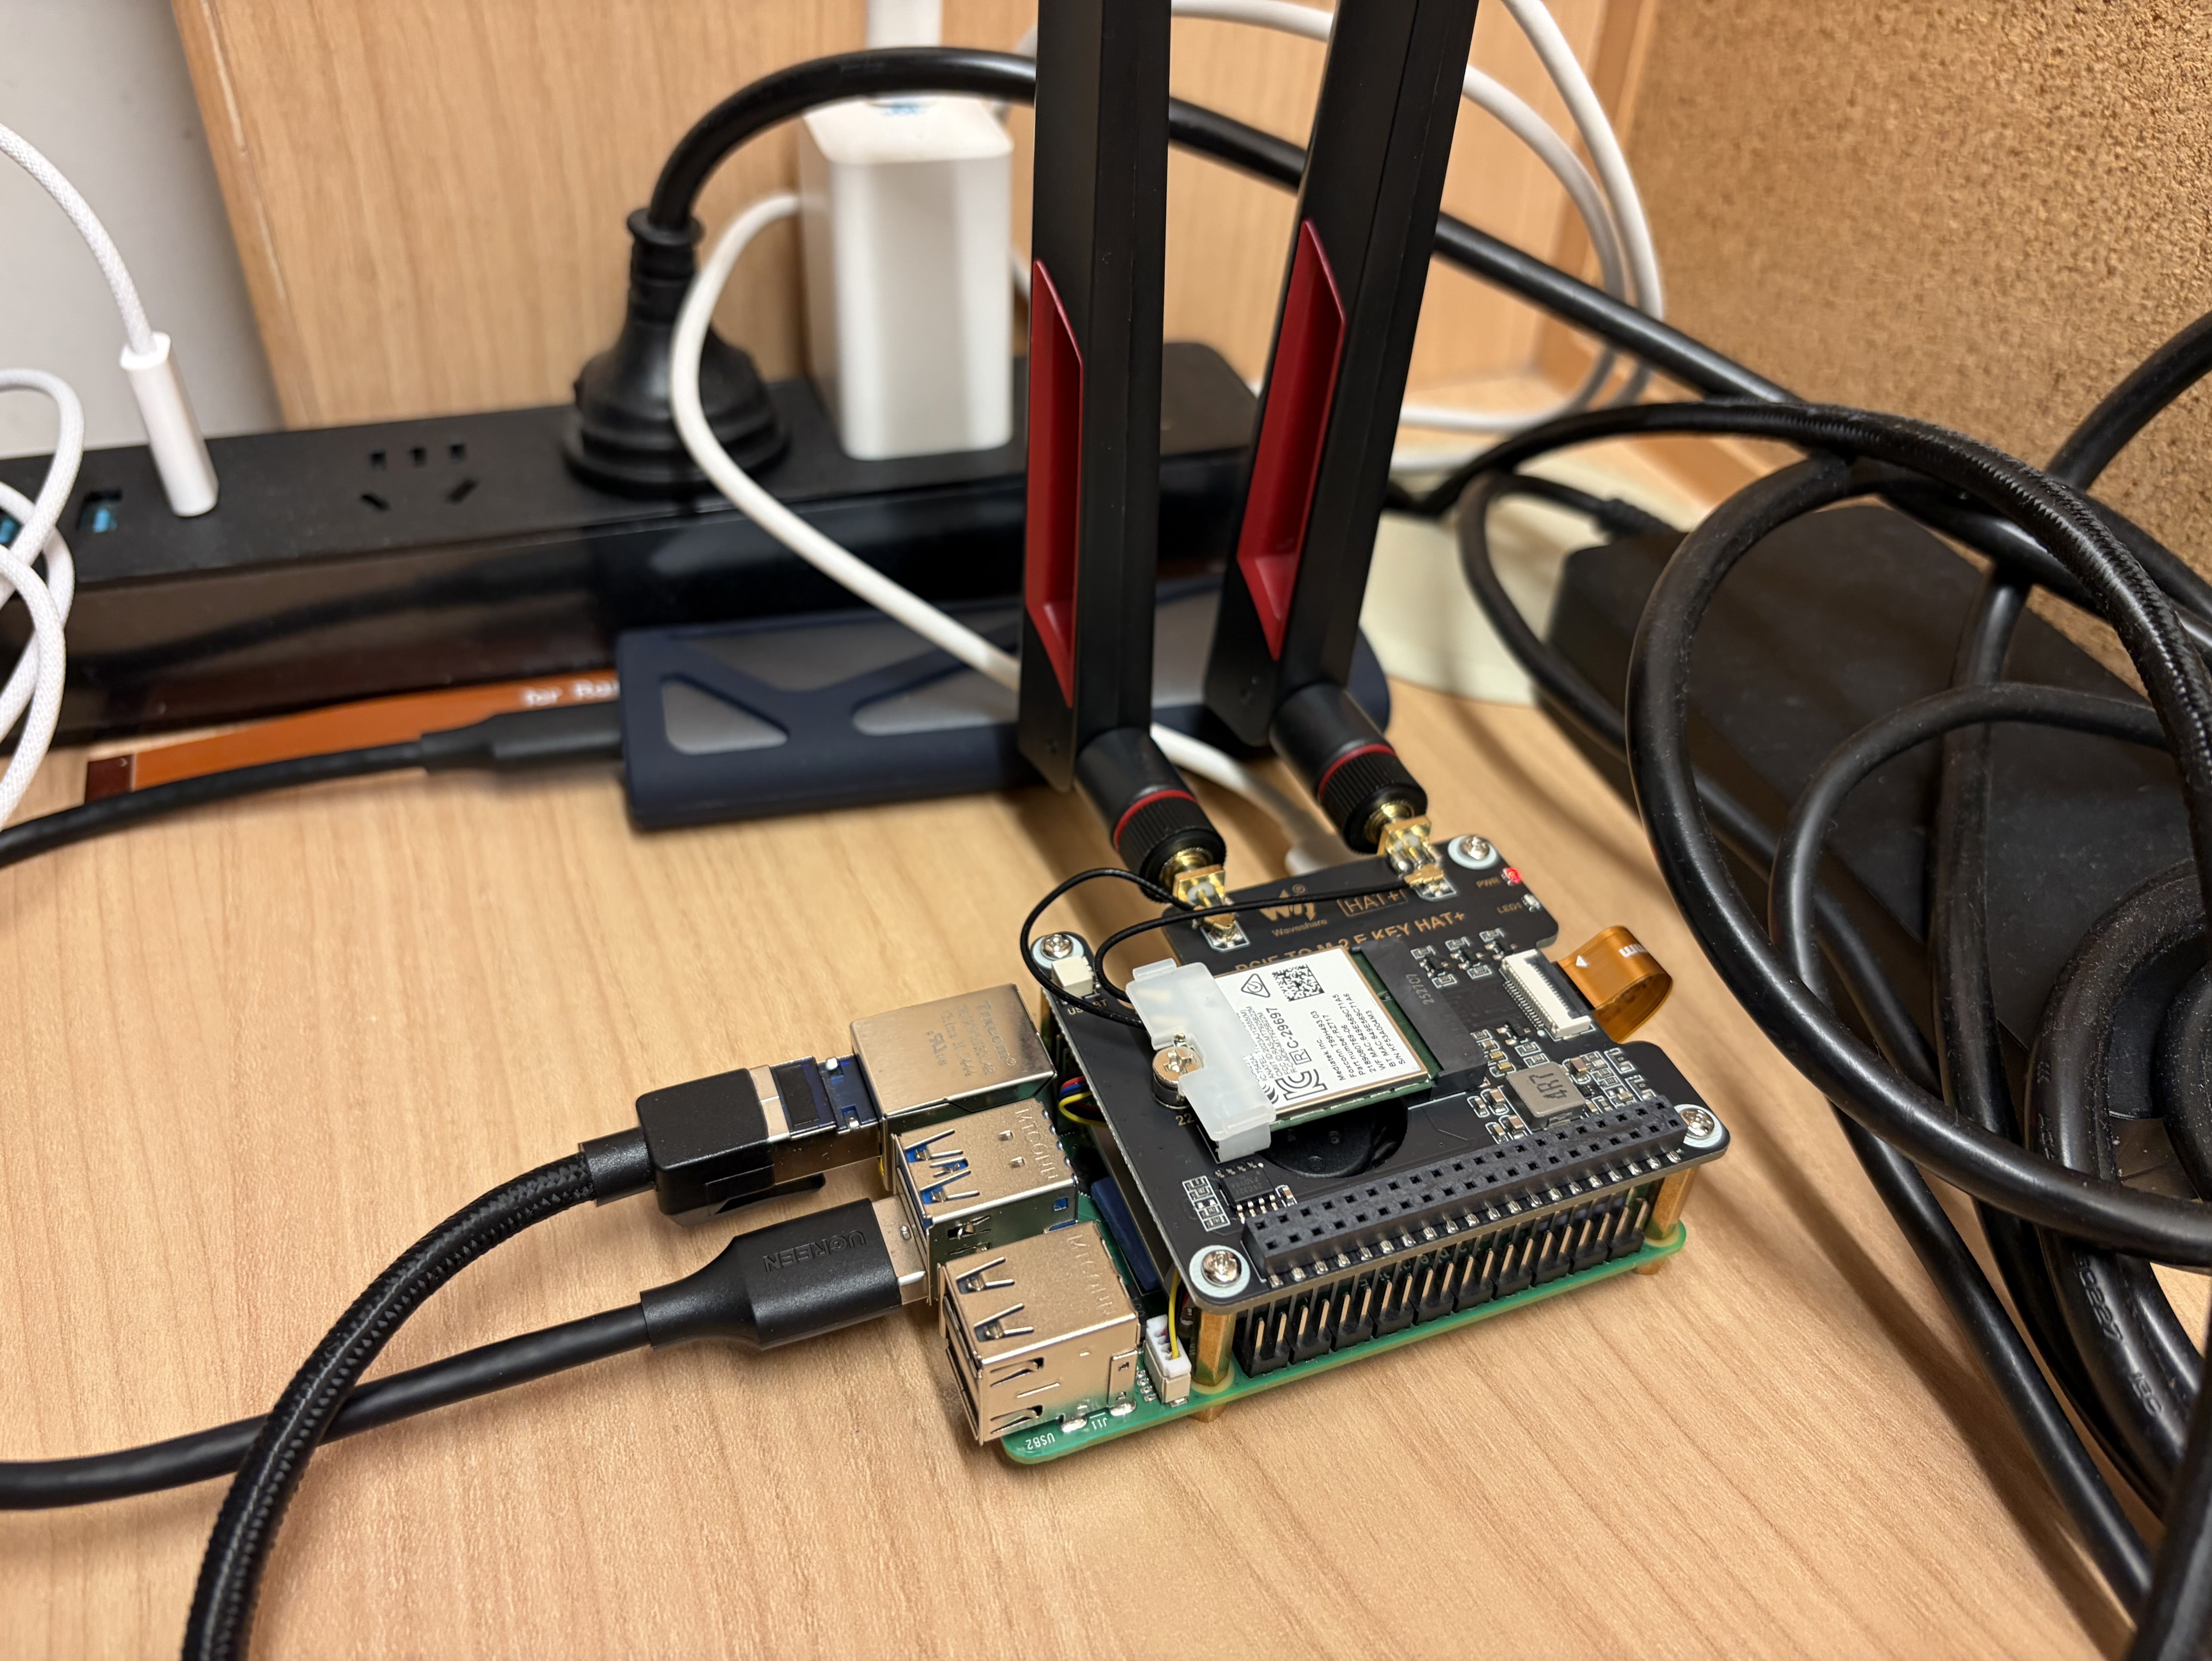
Hardware list
- Raspberry Pi 5 (8 GB)
- MediaTek MT7925 Wi-Fi card (or any Wi-Fi card you already have)
- Raspberry Pi HAT: PCIe to M.2 Key E
- 2 antennas
Assemble the hardware before you continue.
1. Check Wi-Fi card compatibility
IMPORTANT
Latest Raspberry Pi 5 kernel fully supports
mt7925, so you no longer need to compile the kernel yourself.
My Wi-Fi card (MT7925) is not fully supported on Raspberry Pi OS with kernel 6.12.y.
After I plugged it in, the Wi-Fi interface did not appear. If you are on newer kernels,
it might work out of the box. I had to rebuild the kernel myself. Below is how to do it.
NOTE
If your Wi-Fi card driver already works and you can see it in
ip addr, skip this step.
If you are using Intel cards, like BE200 or AX210, they are likely supported. You should
find an interface (usually wlan1) in ip a. However, Intel cards are generally better
for client mode; AP mode has been better for me on MediaTek.
Mediatek MT7925e fails to probe/bind on Raspberry Pi 5 PCIe bus with error -12
By March 6, 2026, mainline support in Raspberry Pi OS kernels for MT7925 on this setup is still incomplete.
Check PCIe
zihao@hkg:~ $ lspci
0001:00:00.0 PCI bridge: Broadcom Inc. and subsidiaries BCM2712 PCIe Bridge (rev 30)
0001:01:00.0 Network controller: MEDIATEK Corp. MT7925 (RZ717) Wi-Fi 7 160MHz
0002:00:00.0 PCI bridge: Broadcom Inc. and subsidiaries BCM2712 PCIe Bridge (rev 30)
0002:01:00.0 Ethernet controller: Raspberry Pi Ltd RP1 PCIe 2.0 South Bridge
You need MEDIATEK Corp. MT7925 to appear here.
Fetch kernel source, prepare
sudo apt update
sudo apt install -y git bc bison flex libssl-dev ccache make \
  libncurses-dev dwarves rsync

git clone --depth 1 https://github.com/raspberrypi/linux.git
cd linux

make bcm2712_defconfig
make olddefconfig
make menuconfig
In make menuconfig: Device Drivers -> Network device support -> Wireless LAN -> MediaTek mt7925 support.
Mark them as M (kernel loadable modules).
Run grep MT7925 .config to make sure these options are enabled.
Compile
make -j"$(nproc)" Image modules dtbsWait for it to finish.
Install
sudo cp /boot/firmware/kernel_2712.img /boot/firmware/kernel_2712.img.bak.$(date +%F-%H%M)
sudo cp arch/arm64/boot/Image /boot/firmware/kernel_2712.img
sudo make modules_install
sudo make dtbs_install
sudo depmod -a
You also need to add dtoverlay=pcie-32bit-dma-pi5 in the [all] section of /boot/firmware/config.txt.
After that, run sudo reboot.
Verify
zihao@hkg:~ $ ip a show wlan1
4: wlan1: <BROADCAST,MULTICAST,UP,LOWER_UP> mtu 1500 qdisc noqueue state UP group default qlen 1000
    link/ether 84:9e:56:9c:71:a5 brd ff:ff:ff:ff:ff:ff
    inet 192.168.50.1/24 scope global wlan1
       valid_lft forever preferred_lft forever
    inet6 fe80::869e:56ff:fe9c:71a5/64 scope link proto kernel_ll
       valid_lft forever preferred_lft forever
If you see the interface appear, the issue is solved. On Raspberry Pi OS, nmcli may automatically
manage this interface in client mode. The output above is already configured for AP mode.
2. Set AP mode
Unmanage from NetworkManager
zihao@hkg:~ $ cd /etc/NetworkManager/conf.d
zihao@hkg:/etc/NetworkManager/conf.d $ ls
10-unmanage-wlan1.conf
zihao@hkg:/etc/NetworkManager/conf.d $ cat 10-unmanage-wlan1.conf
[keyfile]
unmanaged-devices=interface-name:wlan1
Install hostapd
- Through apt:
sudo apt install hostapd- Build from source if you need newer features:
sudo apt update
sudo apt install -y \
  build-essential pkg-config git \
  libnl-3-dev libnl-genl-3-dev \
  libssl-dev libsqlite3-dev
git clone https://w1.fi/hostap.git
cd hostap/hostapd
cp defconfig .config
nano .config
Set your required features in .config, for example, CONFIG_SAE=y.
The default config is generally complete. For Wi-Fi 7, IEEE 802.11be is usually enabled by default.
make -j"$(nproc)"Place the built hostapd binary in a location like /usr/local/bin,
then add a systemd unit file.
zihao@hkg:~ $ sudo systemctl cat hostapd
# /etc/systemd/system/hostapd.service
[Unit]
Description=hostapd IEEE 802.11 AP and authentication server
Wants=network-online.target
After=network-online.target

[Service]
Type=forking
User=root
Group=root

ExecStart=/usr/local/bin/hostapd -B -P /run/hostapd.pid /etc/hostapd/hostapd.conf
ExecReload=/bin/kill -HUP $MAINPID

PIDFile=/run/hostapd.pid
Restart=on-failure
RestartSec=2

[Install]
WantedBy=multi-user.target
Create /etc/hostapd/hostapd.conf:
interface=wlan1
driver=nl80211

ssid=WIFI_NAME
country_code=ES
ieee80211d=1
ieee80211h=1

hw_mode=a
channel=36

wmm_enabled=1

ieee80211n=1
ieee80211ac=1
ieee80211ax=1
# ieee80211be=1 # Kernel 6.12 still lacks full support for this setup.

ht_capab=[HT40+][SHORT-GI-20][SHORT-GI-40]

vht_oper_chwidth=1
vht_oper_centr_freq_seg0_idx=42
vht_capab=[SHORT-GI-80][RXLDPC][TX-STBC-2BY1][SU-BEAMFORMEE][MU-BEAMFORMEE]

he_oper_chwidth=1
he_oper_centr_freq_seg0_idx=42

# ===== Security: WPA3-SAE only =====
auth_algs=1
wpa=2
wpa_key_mgmt=SAE
rsn_pairwise=CCMP

# PMF required for WPA3
ieee80211w=2

# SAE H2E (recommended). If some clients fail, try sae_pwe=0
sae_pwe=1

wpa_passphrase=YOUR_PASSWORD
Start hostapd
sudo systemctl enable --now hostapd
sudo systemctl status hostapd
Expected output is similar to:
zihao@hkg:~ $ sudo systemctl status hostapd
● hostapd.service - hostapd IEEE 802.11 AP and authentication server
     Loaded: loaded (/etc/systemd/system/hostapd.service; enabled; preset: enabled)
     Active: active (running) since Tue 2026-03-03 20:17:58 HKT; 2 days ago
 Invocation: 827f7ab3d457451c857c0bf0c4bf72d1
   Main PID: 22706 (hostapd)
      Tasks: 1 (limit: 9583)
        CPU: 951ms
     CGroup: /system.slice/hostapd.service
             └─22706 /usr/local/sbin/hostapd -B -P /run/hostapd.pid /etc/hostapd/hostapd.conf

Mar 06 01:13:07 hkg hostapd[22706]: wlan1: STA 56:44:77:0d:1d:39 IEEE 802.11: disassociated due to in>
Mar 06 01:13:08 hkg hostapd[22706]: wlan1: STA 56:44:77:0d:1d:39 IEEE 802.11: deauthenticated due to >
Mar 06 05:01:18 hkg hostapd[22706]: wlan1: STA 56:44:77:0d:1d:39 IEEE 802.11: deauthenticated due to >
Mar 06 09:44:03 hkg hostapd[22706]: wlan1: STA 56:44:77:0d:1d:39 IEEE 802.11: associated (aid 4)
Mar 06 09:44:03 hkg hostapd[22706]: wlan1: STA 56:44:77:0d:1d:39 RADIUS: starting accounting session >
Mar 06 09:44:03 hkg hostapd[22706]: wlan1: STA 56:44:77:0d:1d:39 WPA: pairwise key handshake complete>
Mar 06 09:50:23 hkg hostapd[22706]: wlan1: STA 56:44:77:0d:1d:39 IEEE 802.11: disassociated
Now hostapd is set up. Your Wi-Fi can be discovered, but without DHCP, clients cannot use it yet.
3. dnsmasq and Pi-hole
sudo apt install dnsmasq

curl -sSL https://install.pi-hole.net | sudo bash
This installs dnsmasq and Pi-hole.
Create /etc/dnsmasq.d/dhcp.conf.
Example config:
# DHCP only for AP
interface=wlan1
bind-interfaces

# DO NOT provide DNS service (Pi-hole owns :53)
port=0

dhcp-range=192.168.50.50,192.168.50.200,255.255.255.0,12h
dhcp-option=option:router,192.168.50.1      # You are free to choose private IP ranges
dhcp-option=option:dns-server,192.168.50.1

log-dhcp
Now the interface does not have a ip, hostapd does not allocate a ip to the interface. So
before starting dnsmasq, we need to add a ip to wlan1.
One time method:
sudo ip addr replace 192.168.50.1/24 dev wlan1To make it presistant after reboot, prevent dnsmasq and miniupnpd failing, you would need a systmed unit runs before dnsmasq and miniupnpd.
Create /etc/systemd/system/wlan1-lan.service
[Unit]
Description=Configure LAN IPv4 on wlan1
After=sys-subsystem-net-devices-wlan1.device
BindsTo=sys-subsystem-net-devices-wlan1.device

[Service]
Type=oneshot
RemainAfterExit=yes
ExecStart=/usr/sbin/ip link set wlan1 up
ExecStart=/usr/sbin/ip addr replace 192.168.50.1/24 dev wlan1

[Install]
WantedBy=multi-user.target
This systemd unit will allocate ip to wlan1 and make it presistant after reboot.
Don’t forget to add the below snippet to dnsmasq and miniupnpd configuration file.
If dnsmasq and miniupnpd does not wait for wlan1-lan.service they will fail.
After=hostapd.service wlan1-lan.service
Requires=hostapd.service wlan1-lan.service
For Pi-hole, configuration is located at /etc/pihole; tune it as needed. Use pihole status to check it.
Finally, start the service.
sudo systemctl daemon-reload
sudo systemctl restart dnsmasq
From this point, your Wi-Fi Access Point, DHCP and DNS is done. Last puzzle is routing.
TIP
Below you can consider it as a branch, if you don’t need UPnP, finish this section and your router is done. Otherwise, continue to next section. Remember routing requires sysctl and firewall confiuration, you can always come back and it may help.
echo "net.ipv4.ip_forward=1" | sudo tee -a /etc/sysctl.conf # This is enables IP packets forwardingand allow forwarding on your firewall from wlan1 to your WAN, also open port 53 and 67.
table ip filter {
    chain forward {
        type filter hook forward priority 0; policy drop;

        # Stateful firewall
        ct state established,related accept

        # Allow forwarding from LAN to WAN
        iifname "wlan1" oifname "eth0" accept
    }
}
4. miniupnpd
WARNING
UPnP: Universal Plug and Play. It can open firewall ports automatically. It works well for game consoles, BitTorrent, Tailscale, etc., offering direct-connection capabilities, but it requires proper security enforcement during setup.
Installation
sudo apt install miniupnpd nftables
sudo apt remove ufw
# Do not let ufw modify the firewall from now on. Control nftables entirely.
Setup
Below is the Debian miniupnpd unit file:
zihao@hkg:~ $ sudo systemctl cat miniupnpd
# /usr/lib/systemd/system/miniupnpd.service
[Unit]
Description=Lightweight UPnP IGD & PCP/NAT-PMP daemon
Documentation=man:miniupnpd(8)
After=network-online.target

[Service]
Type=forking
EnvironmentFile=-/etc/default/miniupnpd
ExecStartPre=/usr/libexec/miniupnpd-startstop-helper.sh start
ExecStart=/usr/sbin/miniupnpd -f /etc/miniupnpd/miniupnpd.conf $MiniUPnPd_OTHER_OPTIONS
ExecStopPost=/usr/libexec/miniupnpd-startstop-helper.sh stop
PIDFile=/run/miniupnpd.pid

# #1033012, do not make TasksMax too harsh
TasksMax=16
CapabilityBoundingSet=CAP_NET_ADMIN CAP_NET_BROADCAST CAP_NET_RAW CAP_SYSLOG
MountAPIVFS=yes
NoNewPrivileges=yes
PrivateMounts=yes
PrivateDevices=yes
PrivateTmp=yes
MemoryDenyWriteExecute=yes
ProtectSystem=full
ProtectHome=yes
ProtectHostname=yes
ProtectClock=yes
ProtectKernelTunables=yes
ProtectKernelModules=yes
ProtectKernelLogs=yes
ProtectControlGroups=yes
LockPersonality=yes
RestrictRealtime=yes
RestrictNamespaces=yes
RestrictSUIDSGID=yes

[Install]
WantedBy=multi-user.target
Notice that miniupnpd-startstop-helper.sh runs during startup and stop.
These helper scripts call additional scripts in /etc/miniupnpd:
zihao@hkg:/etc/miniupnpd $ ls
miniupnpd.conf          nft_delete_chain.sh  nft_init.sh
miniupnpd_functions.sh  nft_flush.sh         nft_removeall.sh
The Debian-shipped miniupnpd helper scripts contain hard-coded values.
Specifically, they can hard-code creation/use of an inet table named filter
(priority 0). If you already use your own nftables design, this hard-coded filter
table behavior can conflict with your rules and chain layout.
For example, if you load your own custom table and then start miniupnpd,
it may inject/manage its own filter table/chains unexpectedly. In that case,
clients on this Wi-Fi may fail to forward traffic to eth0 until you align names/rules.
My suggestion: modify those helper scripts and remove the parts that create/delete
tables you do not want managed automatically. Then, in /etc/miniupnpd/miniupnpd.conf,
set upnp_table_name and upnp_nat_table_name to your intended table.
Example:
# Table names for netfilter nft. Default is "filter" for both.
upnp_table_name=filter
upnp_nat_table_name=filter
# Chain names for netfilter and netfilter nft
# netfilter: defaults are MINIUPNPD, MINIUPNPD, MINIUPNPD-POSTROUTING
# netfilter nft: defaults are miniupnpd, prerouting_miniupnpd, postrouting_miniupnpd
upnp_forward_chain=forwardUPnP
upnp_nat_chain=UPnP
upnp_nat_postrouting_chain=UPnP_Postrouting
upnp_nftables_family_split=no
Before you start, make sure nftables contains these fields.
Example /etc/nftables.conf:
#!/usr/sbin/nft -f

add table inet filter
flush table inet filter

table inet filter {

    # ---------- FILTER ----------
    chain input {
        type filter hook input priority 0; policy drop;

        iif "lo" accept
        ct state established,related accept # Stateful firewall

        # WAN services go here

        # LAN -> router services
        # 67 DHCP; 53 DNS; 1900 and 5351 for UPnP
        iif "wlan1" udp dport {67,53,1900,5351} accept
        iif "wlan1" tcp dport 53 accept

        ip protocol icmp accept
        ip6 nexthdr ipv6-icmp accept
    }

    chain forward {
        type filter hook forward priority 0; policy drop;

        ct state established,related accept

        # Let miniupnpd-installed ACCEPT rules for forwarded mappings be evaluated
        jump forwardUPnP

        # Normal routing
        iif "wlan1" oif "eth0" accept
        iif "tailscale0" oif "wlan1" accept
        iif "wlan1" oif "tailscale0" accept

        # Allow DNATed flows (UPnP port-forwards) after prerouting
        iif "eth0" oif "wlan1" ct status dnat accept

        ip protocol icmp accept
    }

    chain output {
        type filter hook output priority 0; policy accept;
    }

    # miniupnpd will add/remove rules here:
    chain forwardUPnP { }

    # ---------- NAT ----------
    # miniupnpd will add DNAT rules in UPnP (jumped from prerouting)
    chain prerouting {
        type nat hook prerouting priority dstnat; policy accept;
        jump UPnP
    }

    # miniupnpd will add SNAT helper rules here if needed
    chain postrouting {
        type nat hook postrouting priority srcnat; policy accept;

        # Allow miniupnpd to do its NAT postrouting work first
        jump UPnP_Postrouting

        # Your masquerade rules
        oif "eth0" ip saddr 192.168.50.0/24 masquerade
        oif "tailscale0" ip saddr 192.168.50.0/24 masquerade
    }

    # miniupnpd will add DNAT rules here:
    chain UPnP { }

    # miniupnpd will add NAT postrouting rules here:
    chain UPnP_Postrouting { }
}
Security tips
In /etc/miniupnpd/miniupnpd.conf, check this part:
# UPnP permission rules (also enforced for NAT-PMP and PCP) for IPv4
# (allow|deny) (external port range) IP/mask (internal port range) (optional regex filter)
# A port range is <min port>-<max port> or <port> if there is only
# one port in the range.
# IP/mask format must be nnn.nnn.nnn.nnn/nn
# Regex support must be enabled at build time : ./configure --regex
# It is advised to only allow redirection of ports >= 1024
# and end the rule set with "deny 0-65535 0.0.0.0/0 0-65535"
# The following default ruleset allows specific LAN side IP addresses
# to request only ephemeral ports. It is recommended that users
# modify the IP ranges to match their own internal networks, and
# also consider implementing network-specific restrictions
# CAUTION: failure to enforce any rules may permit insecure requests to be made!
#allow 1024-65535 192.168.0.0/24 1024-65535
# disallow requests whose description string matches the given regex
# deny 1024-65535 192.168.1.0/24 1024-65535 "My evil app ver [[:digit:]]*"
#allow 1024-65535 192.168.1.0/24 1024-65535
#allow 1024-65535 192.168.0.0/23 22
#allow 12345 192.168.7.113/32 54321
#deny 0-65535 0.0.0.0/0 0-65535

allow 1024-65535 192.168.50.0/24 1024-65535
deny 0-65535 0.0.0.0/0 0-65535
Ensure only your LAN clients are allowed to add UPnP rules.
Run sudo systemctl enable --now miniupnpd to start.
Final check
Run sudo nft list ruleset. You should see a non-empty filter table with rules inside.
table inet filter {
    chain input {
      type filter hook input priority filter; policy drop;
      iif "lo" accept
      ct state established,related accept
      iif "eth0" udp dport { 40000, 41641 } accept
      iif "wlan1" udp dport { 53, 67, 1900, 5351 } accept
      iif "wlan1" tcp dport 53 accept
      iif "tailscale0" accept
      ip protocol icmp accept
      ip6 nexthdr ipv6-icmp accept
    }

    chain forward {
      type filter hook forward priority filter; policy drop;
      ct state established,related accept
      jump forwardUPnP
      iif "wlan1" oif "eth0" accept
      iif "tailscale0" oif "wlan1" accept
      iif "wlan1" oif "tailscale0" accept
      iif "eth0" oif "wlan1" ct status dnat accept
      ip protocol icmp accept
    }

    chain output {
      type filter hook output priority filter; policy accept;
    }

    chain forwardUPnP {
      iif "eth0" th dport 41641 @nh,128,32 0xc0a832a7 @nh,72,8 0x11 accept
    }

    chain prerouting {
      type nat hook prerouting priority dstnat; policy accept;
      jump UPnP
    }

    chain postrouting {
      type nat hook postrouting priority srcnat; policy accept;
      jump UPnP_Postrouting
      oif "eth0" ip saddr 192.168.50.0/24 masquerade
      oif "tailscale0" ip saddr 192.168.50.0/24 masquerade
    }

    chain UPnP {
      iif "eth0" @nh,72,8 0x11 th dport 41643 dnat ip to 192.168.50.167:41641
    }

    chain UPnP_Postrouting {
    }
}
You can see one of my clients has already requested a UPnP rule, and it is working.
Benchmarking
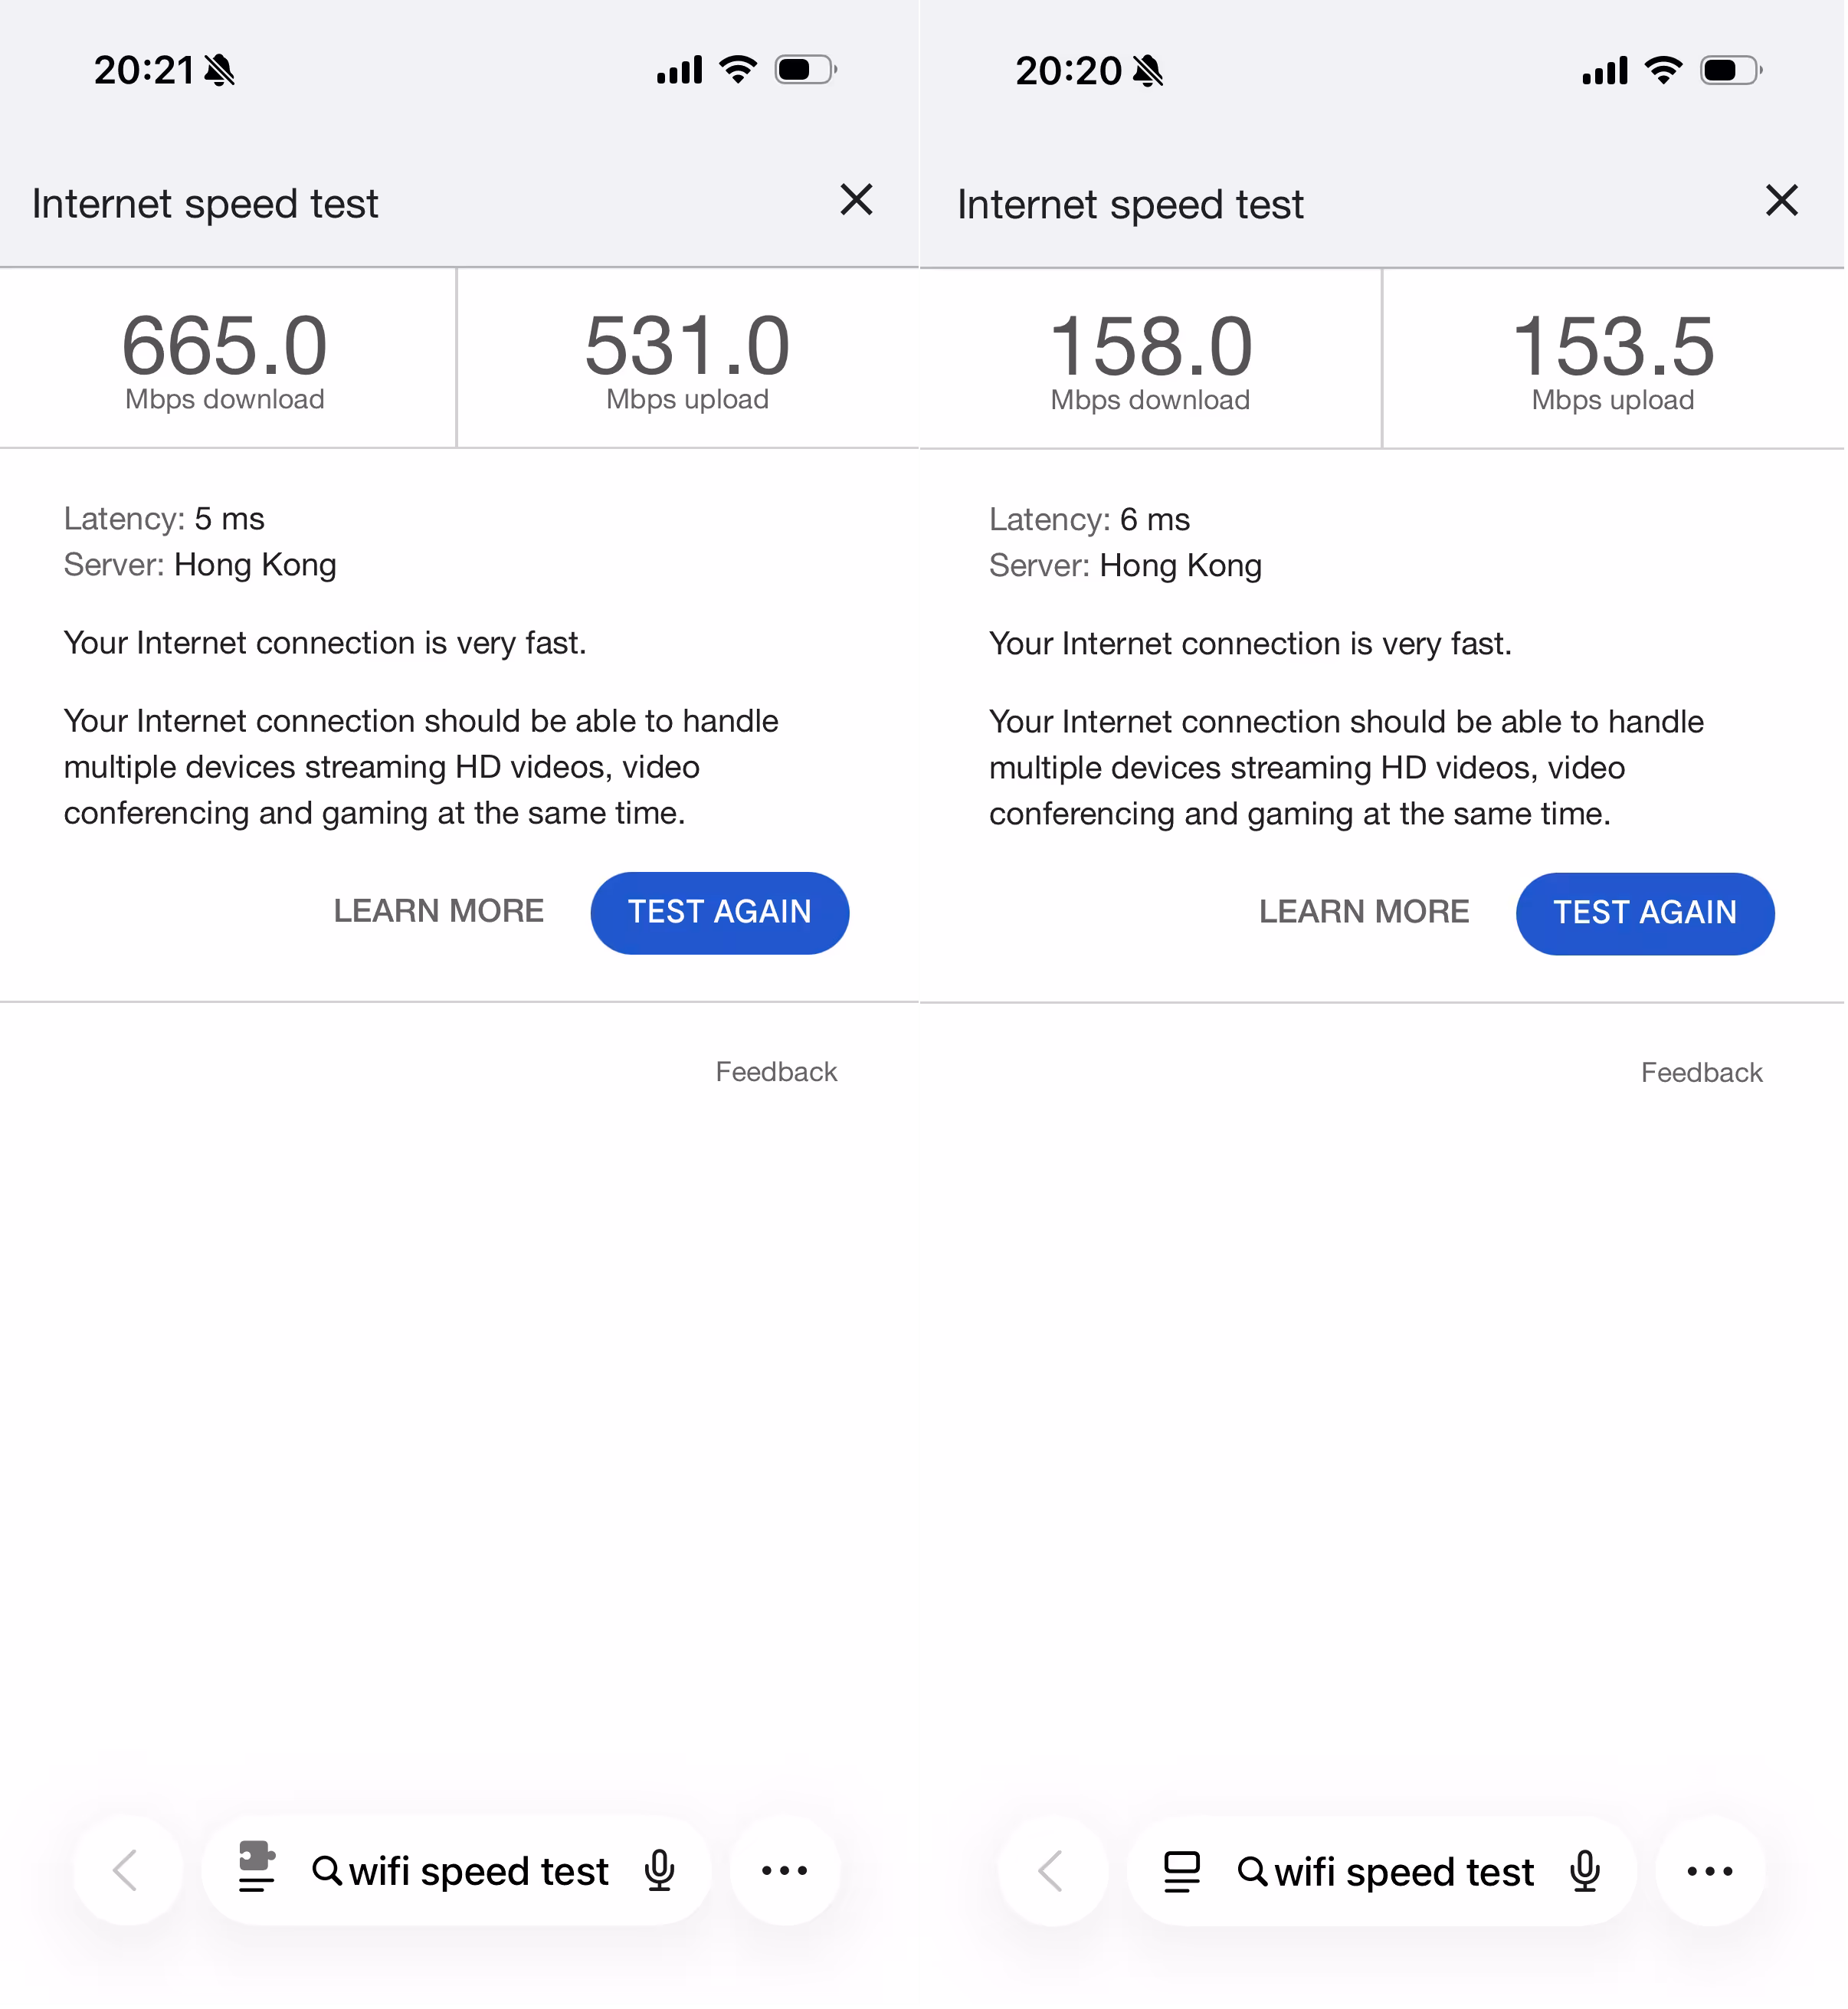
My WAN uses Ethernet from my dorm. I know it is below 1000 Mbps but above 500 Mbps. I tested raw cable speed on my computer. This Wi-Fi 6 AP at 5 GHz reaches throughput close to the Ethernet bottleneck.
Wi-Fi 7 AP at 6 GHz cannot be achieved yet in this setup because kernel 6.12 does not
fully support 6 GHz AP mode for this card. If Raspberry Pi OS rolls out newer kernels
later this year, I will test Wi-Fi 7 again.
Hardware selection guide
Selecting hardware is important for a DIY router. In this tutorial I use a Raspberry Pi 5 and MT7925 Wi-Fi card. MT7925 on Raspberry Pi 5 may require custom kernel builds, which adds complexity, but the cost is low compared to some full-feature Wi-Fi 7 cards. This card currently has partial Wi-Fi 7 capability in this use case.
If you need Wi-Fi 7 as a client, check Intel BE200 / AX210 testing and reports. You may want to read:
Exploring Wi-Fi 7 on a Raspberry Pi 5 by Jeff Geerling (Mar 14, 2025)
For AP mode, choose a Wi-Fi card that supports dual- or tri-band operation concurrently. MT7925 typically supports one active band at a time in this setup (either 2.4 GHz or 5 GHz).
MT7915 supports dual-band (2.4 and 5 GHz) for Wi-Fi 6. It is older, and Linux kernel support
is more mature. See:
mt7915e driver fails to load on Raspberry Pi 5 with error -12
Driver issues can still occur; a custom kernel build may help. For mt7925e, without custom
kernel changes, error -12 can also appear.
QCM865 is also recommended by parts of the community and can provide full-speed Wi-Fi 7,
but a custom kernel may still be needed. See:
ath11k is relevant for QCM865 as well and may not be fully enabled in your default
Raspberry Pi OS kernel build.
TIP
Mar 14 2026: Pi5 PCie can only provide limited power, so even if you got a strong card you might not be able to power it. Don’t expect Pi to be a good at AP. Buy a cheap router and flash OpenWrt, and set that router as an AP. Why not just use a router? Normal router has limited system resources, but pi isn’t you can do more customization.